Before you start making a stand, you need to know its exact size. This is necessary for the most economical use. Supplies.
What affects the cost of the finished stand, and, accordingly, your profit.
First of all, the dimensions of the purchased material, its brand and the resolution of interior printing.
Let's start with interior printing, it takes half the cost of consumables. average cost printing 350-400 rubles. per square meter. Higher does not mean better quality.
There are different sizes of printing plotters, but the main sizes for interior printing are as follows: 105 cm, 125 cm, 140 cm, 160 cm.
Before ordering a print, make sure what size plotter the company has. What is it for? For example, you print a layout of 90x60 cm. And the film in the printing company is only 125 cm. They just don’t have another plotter. Therefore, you will also pay extra for a piece of film 35x60 cm. If the printing company charges strictly for square meters of printed material, then this item is no longer needed.
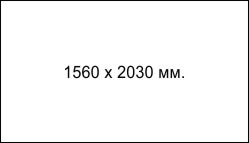
PVC (polyvinyl chloride, PVC) is the most modern and most common material. PVC plastic is sold in various sizes, but we only need two sheet sizes of 1560 x 2030 mm. and 2030 x 3050 mm.
Consider the example of Zenon. There is one in every city.
 Foamed PVC plastic UNEXT Strong - 0.58 - 0.62 g/cm³
Size 2030 x 3050 x 3 mm - 6.2 sq.m. The cost of one sheet is 1970 rubles, and, accordingly, a square meter is 318 rubles.
The second size is 1560 x 3050 x 3 mm. The cost is 1517 rubles. sheet. 319 rub. square meter.
Foamed PVC plastic UNEXT FRESH - 0.50 - 0.55 g / cm³ size 2030 x 3050 x 3 mm - 6.2 sq.m. worth 1833 p. or 296 rubles. per one square meter. Prices of course change, but not so much, as Russian manufacturers have appeared.
 For example, you bought a stand layout 120x150 cm in size and PVC plastic 1560 x 3050 x 3 mm in size. and printed two mock-ups of the stand placed on one sheet of plastic. But you have leftover plastic 36 x 305 cm. From this piece you can make seven stands 30x40 cm.
The average price of a stand (one can say the minimum, depends on the region) 120x150 cm - 2790 rubles. Thus, the income from your PVC plastic sheet will be 6980 rubles, and if the stands have pockets, then add another 3600 rubles from one PET sheet. Having spent 1-2 hours on rolling stands, depending on experience, you will earn decent money.
Consider stands with pockets. The production of such stands takes longer, but the profit is much greater.
Pockets are made of transparent PET with a thickness of 0.75 to 1 mm. PET transparent is sold mainly in one size 1250 x 2050 mm. Let's look again at the example of Zenon.
 ZENOPET PET sheet size 1250 x 2050 mm. and thickness from 0.75 to 1 mm., holds 36 pockets measuring 22x32 cm (vertically 32 cm - 4 pockets and horizontally 22 cm - 9 pockets.)
PET thickness for pockets 0.75 mm., - cost per sheet - 460 - 540 rubles. The cost of one pocket is 13 rubles. If you add 5 rubles. (the cost of adhesive tape), the price of the pocket is 18 rubles.
PET 1250 x 2050 mm. 1 mm., sheet price - 630 - 770 rubles. The price of one pocket with adhesive tape is 24 rubles. The minimum cost of the pocket included in the cost of the stand is 90-100 rubles. for the pocket. The purchase price of such a PET pocket in a third-party company is 60-100 rubles.
Now there are two types of double-sided tape for sticking pockets: 15 mm and 6 mm. width. At the same time, the adhesive tape is 15 mm x 33 m x 1 mm. can cost about the same or not much more than 6 mm adhesive tape. However, using 15 mm tape, you will cut it into three pieces of 5 mm. and get already 100 meters in length. This option must also be taken into account.
Children are indefatigable dreamers, and their activities can endlessly touch and delight adults. When the results of creativity are in a clearly visible specially designated place, young fidgets are delighted.
Exhibition board equipment is not always associated with large cash outlays. Any interested parent is able to make children's stands with their own hands.

How to choose the right material
Among the large assortment of modern stands, more and more consumers opt for cork boards. They are easy to use, reliable, durable, affordable.

Natural material - cork oak bark - satisfies general requirements safety for children's products and has a number of positive qualities:
- ecologicaly clean;
- easy to clean, does not attract dust;
- moisture resistant;
- refractory;
- chemical resistant;
- not damaged by fungus, insects;
- not electrified;
- shockproof;
- wear-resistant.
Cork stands will become win-win both for home and kindergarten.

How to make a stand
You do not need to have special craft skills and knowledge to please yourself and your children with a functional novelty in the house.

Think in advance how to harmoniously fit the new stand into the interior.

You can experiment both with the color of the board itself - paint it or upholster it with a fabric of the desired color, and with the frame, choosing the best combination.
The frame is usually made of wood, plastic, metal profile. It is also advised to use cable channels, the width of which is slightly greater than the thickness of the board.

Choose the type of wall mount for the stand: non-removable version with glue or free hanging on hinges.

The minimum set of blanks and tools used, 30 minutes of work - and the result will be on the wall.
Determine the desired dimensions of the stand, prepare a cork sheet to fit.

Choose the material for the back wall - plywood, fiberboard.

Glue both sheets. Glue - liquid nails, you can use another. Degrease the surface first, after applying the glue, press the parts tightly against each other. If desired, cover the working surface of the stand with a cloth.

Attach the previously prepared frame to the base. At will - attach with reverse side fastening loops.

Fix the stand to the wall with glue or double-sided tape for a non-removable option. For alternative way- hang on loops.
How to rationally use the stand
After you have made a stand with your own hands, you can begin to actively exploit it.

Note!

There are two main formatting methods. You can fix pockets on the surface of the board. These can be files for papers, or transparent pieces of thin plexiglass, fixed on double-sided tape.

This type of design is used for information stands.

The pockets hold sheets of paper. important information, which parents should know about the working hours, routine, rules of behavior for children in kindergarten.

The information can be updated daily (food menu) or as needed.

Stands are actively used by people different ages both at work and at home. Reminders about important events, planning for the near future, pleasant memories captured in photographs, visualization of their desires, a convenient organizer - everyone will independently add the most relevant for themselves to the list of useful functions.
On cork demonstration stands, the necessary items - photographs, pictures, paper notes, small souvenirs are fastened with buttons, pins, tailor's needles.
Note!


The surface of the board does not suffer from this, there are no holes visible to the eye. When designing a stand for children, you need to make sure that sharp objects cannot harm the kids.

The stand, on which educators attach the results of children's work for the day, is always popular with caring parents. And the children are happy to present new crafts and arrange mini-exhibitions already in the apartment.

Take a photo of the filled stand as a souvenir, and let it be constantly updated - the world of children's imagination is inexhaustible.

DIY booth photo


Note!


If your child goes to Kindergarten, or if you yourself go there as an employee of the teaching staff, then sooner or later you will definitely be puzzled by the problem of creating stands for kindergarten. And the thing is that most kindergartens simply cannot afford ready-made stands. So parents and educators, headed by the head of the preschool educational institution, have to somehow solve this problem on their own or with their own means. And, we will notice, many in this business very much succeed! And they find a solution that is quite predictable, namely, they make stands for kindergarten with their own hands. How? And this is what we are going to find out now.
Where to begin?
In fact, coping with this problem through the joint efforts of parents, children and educators is quite simple. The main thing is to generate ideas. However, our educators, who work almost on sheer enthusiasm, have no problems with this. What stands can a kindergarten need? These are information or thematic stands. Information stands are intended, first of all, for parents, and thematic ones for children.
Information about the daily routine, menus, announcements and news is posted on the stands for parents. Stands for children are used as visual didactic materials. They help in the education and development of kindergarten students, and also play an important role in interior design. Therefore, depending on the purpose, stands can be made from different materials. And, of course, you need to start with the search for materials and the further implementation of the generated ideas.

Information stands
It turns out that information stands are much easier to make than thematic ones. The choice is limited here. What stands can be offered to parents for review? “For you, parents”, “Menu”, “Our birthdays”, “Schedule of classes”, “Daily routine”, “Announcements” and some other information stands standard for kindergarten.
If the kindergarten is not able to purchase ready-made stands, then you can make them yourself. To do this, use any flat surface, starting from the wall and ending with boards made of chipboard or plywood. In addition, you will also need wallpaper or self-adhesive film, patch letters cut out of cardboard or colored paper, and patch pockets made of transparent hard or soft materials. It can be purchased pockets industrial production, home-made pockets from the same plexiglass or pockets made from a frame-frame with a transparent film stretched over it.
In the end, you can use ordinary colored holders on needles (for wooden stands) or on magnets (for metal shields). In this case, it is quite possible to do without pockets by attaching sheets of information directly to the stand. You can do without pockets by also making frames from polymer construction moldings or ceiling plinths. Such frames (as well as letters or pockets) are attached to the stands with double-sided adhesive tape and can always be easily replaced or moved to another place.
And as a decor, you can use drawings cut out of wallpaper (with a children's print), and decoretto film (decorative wall stickers) with thematic images, and printouts of drawings downloaded from the Internet or made in Photoshop. You can also decorate stands with improvised materials: braid or ribbons, appliqués, collages. However, this already depends on the individual abilities of parents and educators.

Thematic stands
Thematic stands on manufacturing technology almost do not differ from information. But there are so many more options for decorating them! The basis of the themed stand is a shield, which should be strong, but light, as it will probably have to be moved when used for classes. Such a base can be a sheet of plywood or chipboard, plexiglass or ordinary ceiling tiles. The last option is not the easiest, but the cheapest. The tiles are firmly glued together, forming a shield of the desired size, and then this shield is pasted over with wallpaper or self-adhesive film.
In the design of the stands, you can use almost any materials that are safe for children. It can be drawings, and printouts, and applications, and fabrics, and natural material(shells, cones, straws, etc.). For example, for an astronomical stand, you can use black glossy self-adhesive and dark blue or silver embossed wallpaper. The sun and planets can also be cut out of paper, textured wallpaper or the same ceiling tiles, cover with acrylic paints or gouache or cover with multi-colored self-adhesive film. The orbits of the planets on such a stand can be laid out using colored cords or yarn, and the same mittens or sunglasses will generally come in handy for the “Seasons” stand.
But the stand "My Motherland" will not require special efforts from educators and parents in the design. For example, in the center of the stand, you can place a map of the country, which is easy to buy in a bookstore or print on a color printer. The image of the coat of arms can also be printed. The words of the national anthem can also be printed or typed from overhead letters. And the highlight of such a stand will be the flag - a real canvas of the flag, made of real fabric.
The Time of Day stand can be made interactive with a real clock face and moving hands. For the “Learning to count” stand, you can use a metal shield, decoretto film and ordinary fridge magnets in the form of animals, which will be used instead of numbers when teaching counting. And such magnets can be made from salt dough or plastic.
In a word, how many dreamers, so many fantasies! By the way, children turn out to be very useful assistants not only in the manufacturing process, but also at the stage of generating ideas. So do not neglect their help. After all, all this is done, first of all, for them, and children's eyes, which see the world in a completely different way than adults, will look at these stands.
Anna Svetlichnaya
Dear colleagues!
In connection with the introduction of the Federal State Educational Standard, the task educator organize work with parents, one of the forms of which is information corners. I want to bring to your attention stand making master class"Nobody is forgotten, nothing is forgotten!"
First, we need to develop a layout. I did it in PowerPoint
To work we need...

Width of our stand 1 meter, i.e. 2 tiles.

Since the layout is 4 wavy stripes, then 1 template is suitable for both the concave and the convex part, only upside down.

Apply the template to tiles, circle with a pencil.

top cut tiles

and apply to the bottom of the part, combine, so that the cut coincides, and when we assemble booth I didn't have to tweak the details.

We turn the part over, circle it and cut it out from another tiles, then the details will match.


Details are best numbered immediately with reverse side. Thus, 4 strips are cut, each of which consists of 2 parts.

For painting, mix color with PVA glue, achieving the desired shade. We color the parts according to the numbering, not forgetting to paint over the edges.


Name booth typing on a computer, making templates, tracing and cutting out tiles.

We also need flowers. We make a template.

We will have flowers voluminous. To do this, we will have to cut the template several times.

First, cut off the cup from the flower. We circle on tile received parts.

Then we cut the cup into 2 parts, circle the smaller one, cut it out.

We cut off the upper part from the flower template, circle the resulting part on tiles.

We cut off another part of the template and circle the very bottom of the flower on tiles.
It turns out bulk flower.

Now let's paint all the details with the desired color. When the paint is dry glue it together "The Dragon". Details of flowers are glued together on the reverse side with scraps tiles.


More for making booth we need the Eternal Flame. In our case, the picture is cut out, glued with a pencil glue and laminated with adhesive tape. Cut out with a clerical knife, retreating from the edge of the picture a couple of mm.


Now we will deal with the pockets that are needed to place information. They can be made from: files, corners, folders, or you can buy ready-made ones. We will make pockets from folders. The folder needs to be cut.


With the help of self-adhesive paper, we make a frame. Glue double sided tape on the reverse side.


Now let's collect our stand. Parts are fastened together on the reverse side with scraps tiles and glue"The Dragon".Then we place our details on it: pockets, flowers, letters and Eternal Flame. Fill in the pockets with information.
I decided to somehow make a couple of rotary stands, as in the photo. Usually these are used for hanging satin ribbons on reels. Height 220 cm, width 50 cm - so, the thing is not small.
The stand must be swivel. I had to break my head a bit. It was necessary to select a pipe, a bearing and a washer so that together they would form a swivel assembly (the design of the swivel assembly itself will be presented later). At the beginning, I thought that I could just pick them up to each other "in place", but very soon I realized the viciousness of this path and went to study literature.
Having considered different combinations choose the best option:
From "GOST 3262-75. Steel water and gas pipes." chose a pipe - "sorokovka" with an outer diameter of 48.

The frame of the stand is made of profile pipe 25x25x1.5. Legs from a pipe 20x40x2. Crossbeams from a bar 7 mm.

From "GOST 7872-89. Single and double thrust ball bearings." chose bearings of the 8210 series with an inner diameter of 50.


In "GOST 11371-78. Washers." I found washers d48 with accuracy class A and an inner diameter of 50.

But if there were no problems with the pipe and bearings, then the M48 washers of accuracy class A are not too hot commodity. Couldn't find any for sale.
I found Leirus Business Center LLC on the Internet, located in my city, which had these washers in the price list on the site. I called the specified phone number, but their managers are strange. What is the minimum order, how many pieces are in the package, what is the price per package and what is the delivery time, it was not possible to find out. I'm not talking about what accuracy class according to GOST 11371-78 their washers belong to.
I solved the problem with washers simply - I turned to a turner, who turned them for 70 rubles apiece.

Unfortunately, I don't have pipe clamps. But it is important to accurately set the angles and distances between the frame elements. To do this, I cut out a template from plywood with the required dimensions and exact angles and simply fixed it. profile pipes on it with clamps.

Yes, and there is no bed for the grinder either. Therefore, the cutting of parts is not always ideal.

But after welding, everything falls into place. Boiled with Monolith 2 mm electrodes. Current 50 A with a margin.

Thanks to simple pattern got a good result

We clean the seams with a grinder.

Using the same template, I set up the vertical racks of the frame. It wasn't perfect, but acceptable.

One of the elements of the swivel mechanism is a washer, which is located at the bottom of the frame and which rests on the bearing. It is mounted on four segments, which must be welded accurately enough. To do this, at the beginning we weld the first crossbar at the bottom of the frame.


Now we weld the second crossbar

And having made the same sections, we place the puck in the center

We fix the washer by welding.

In the upper part of the frame there is another crossbar with a piece of pipe welded perpendicular to it. This piece of pipe will also become an element of the swivel frame in the future.
Part of the future stand is ready. Let's call this part "Rotor" because that's what will rotate.


Adjustable feet will be welded on the ends of the legs. Drilled holes for them.

I made another template from the same plywood. It fixes the position of the legs relative to the lower edge of the column and the angle of the legs.

It also fixes the position of the leg relative to the axis of the column.

Using a square, set the position of the legs relative to each other

After work, the template was slightly charred at the welding points, but still quite suitable.

I welded a washer on the stator at the bottom. The thrust bearing will rest on this washer, and the rotor washer on it.

In the upper part of the stand, it was necessary to insert some kind of bushing into the pipe so that the thinner pipe would swell freely in it. Wherein lathe I don't have either. I had to scratch my head a little more.
As a result, for the manufacture of the sleeve, I took a plastic coupling for 32 mm polyethylene pipes. It fits perfectly into the "sorokovka" water and gas pipe. The connection is tight, but it can be disassembled by hand.

Using a drilling machine, I adjusted the inner diameter of the sleeve. Just in case, so that the plastic does not melt and spoil the forstner drill, I set the minimum speed on the machine - everything went smoothly.

I sawed off the extra parts with a hacksaw and that's it - the sleeve is ready

The rotary mechanism works perfectly - nothing dangles, does not creak, it works smoothly. This is clearly seen in the video:
Now we need to give it all a presentable look. First of all, peel off the rust.

Before painting, we protect the adjustable legs and their threads from paint.

And finally, we paint. It was real torment. The fact is that parts of the stands occupied the entire space in the workshop. They had to be painted in parts and rearranged all the time, because they could not be approached from all sides. As a result, in some places, the fresh coating was damaged from an accidental touch, either with the elbow, or with the back, or with something else. So also the omnipresent experience added inconvenience.
Therefore, I had to expand the workshop a little and start another room - for painting. More about it here:
Now painting jobs do not cause too many problems and do not take too much time.

Some difficulties arose when painting the crossbars. They are made from 7mm bar. At the beginning, the strategy was as follows: lay them out on a plane, apply paint with an airbrush, let dry. Then turn them over on the other side and apply paint again with an airbrush. For the third time, the bars should be painted over on all sides. So it was in theory.

But in practice, the bars could not be turned to the other side. Because they are crooked and this curvature always tends to take a lower position. After laying the second layer and seeing that I paint almost the same side, I decided to paint the rods by hand. Oh, and what a chore it is! Two coats took almost two full days.

It was no less dreary to install almost five hundred rod holders, screwing almost a thousand self-tapping screws with a drill into them. By the way, it was not easy to buy them. I had to wander in search of the right amount of identical rod holders.

After installing the rod holders on the frame, we make the final assembly of the stands. At the bottom, the swivel mechanism consists of two washers separated by a bearing. This node holds the entire vertical load.

In the upper part, the rotary mechanism consists of two pipes inserted one into the other and separated by a plastic sleeve. This node holds lateral loads.

It remains to cut the crossbars

And install them in the rod holders

Turntables are almost ready.

There is one more detail left. In the upper part of the stand there is a box, which is put on top and logos are applied to the walls. I decided to make it from 18mm plywood, although Gamma, which served as the prototype, makes it from tin.

In the upper part of the box on the inside there is a ledge with which it is held on the frame of the stand.

I painted the boxes in my new paint brushes, the link to which is above in this article.
The first layer on a tree always lays down disgustingly - bald spots, a pile that has risen and other joys of a painter.
Therefore, I usually put two layers (and sometimes more) with intermediate polishing of the coating with an abrasive sponge. The first primer layer can be diluted with a stronger solvent so that it is absorbed deeper into the wood.

The second layer goes much better.

The stands turned out great. In some places even better than the prototype. In general, the joy of a job well done is present))
